Shower Pan: Materials, Sizes, Drain Placement and How to Choose
The shower pan is the floor of your shower. You rarely think about it until it cracks, leaks or feels slippery. It does a critical job: it catches water and sends it to the drain, so the floor under it stays dry. A good pan lasts for years. A poor choice can cause leaks and costly repairs.
This article is part of our shower guide, where you can compare related options.
A shower pan, also called a shower base, is the shallow tray or floor that forms the bottom of a shower. It slopes toward a drain. Some are one-piece units made of acrylic or fiberglass. Others are tile-ready bases or custom-built floors.
This guide explains the shower pan materials, sizes, drain types, installation basics and what to consider when choosing. You’ll also find a comparison table, a checklist and answers to common questions. It is general information. For installation, follow the maker’s instructions or hire a pro.

Shower Pan Materials
Fiberglass: the cheapest option. It is lightweight and easy to install, but it scratches more easily and can feel thin. Acrylic: a step up from fiberglass. Acrylic offers more finish options, such as a non-slip surface or a molded seat. It’s still lightweight and relatively low in cost. Cast iron: the most durable and holds heat well. It is very heavy and usually needs extra structural support. It costs more. Solid surface and stone resin: smooth, seamless and durable. Costs more than acrylic. Tile-ready (foam or composite) base: a flat, textured base made to be tiled over. It allows the most design freedom. Tile is the most customizable but also the costliest and hardest to install. Custom-built mortar bed: a traditional method for tile showers, built on site. It is flexible but needs skill and careful waterproofing.
| Material | Cost | Durability | Notes |
|---|---|---|---|
| Fiberglass | Lowest | Lower, scratches | Light, easy to install |
| Acrylic | Low to medium | Good | More finishes |
| Solid surface | Medium to high | Good | Seamless |
| Cast iron | High | Highest | Heavy |
| Tile-ready | Medium to high | Depends on tile | Custom look |
Shower Pan Sizes
Prefabricated pans come in standard sizes at home improvement stores. Common widths run from about 30 to 60 inches. Typical depths are 30 to 36 inches or more. Common examples include 32 by 32, 36 by 36, 32 by 48, 34 by 60 and 36 by 60, but sizes vary by brand.
Drain placement can dictate which size works in your bathroom, so check plumbing first. The size also affects comfort. A small stall works for a tight space, while larger pans give more elbow room and suit doorless or walk-in designs.
Measure the space where the shower will go, including wall studs and any alcoves. Pans have to fit snugly between walls or against a curb. Check the pan’s actual dimensions and the manufacturer’s rough-in specifications.
Minimum sizes depend on local code. Check with your building department. For more on minimum shower sizes, see the walk-in shower guide.
Center Drain vs Offset Drain
Center drain: the drain sits in the middle of the pan. It’s the most common and most versatile and suits centered plumbing. Offset drain: the drain sits to one side or in a corner. It’s useful when existing piping can’t be moved easily. It also keeps the drain away from where you stand. Offset drains need a properly designed slope so water doesn’t pool. Linear drain: a long, narrow drain along one edge. It allows a single-slope floor, which suits large tile and curbless showers.
Drain size should match the pan size and the shower head‘s flow rate. Locate your existing drain or plan the new rough-in before buying a pan.
Shower Pan Shapes
Rectangular: the most common shape. Square: fits small spaces and corner showers. Neo-angle (corner): a corner pan with a cut corner. It saves floor space. Quarter-round: a curved front that fits into a corner. Single-threshold, double-threshold or triple-threshold: describes how many sides have a raised edge. A single-threshold pan has one edge where you step in, with walls on the others. Curbless or low-threshold: a near-flat pan for easy entry.
Installation Basics
Installation steps vary by type, so follow the manufacturer’s guide. Here is a general overview, not a full build guide.
- Check the subfloor. It must be flat, level and strong enough.
- Plan the drain. Position the rough-in plumbing to match the pan.
- Test-fit the pan. Make sure it fits the walls and the drain location.
- Set the pan. Many pans sit in a bed of mortar or setting material. Others sit on a flat floor with shims.
- Connect the drain. Use the right gaskets and fittings. Test for leaks.
- Seal the edges. Use waterproof sealant where needed.
- Install the walls. Wall panels, tile backer board or other surrounds.
- Test. Run water and watch for leaks.
Drop-in pans are quicker to install, which suits confident DIYers. Tile-ready bases take longer but allow custom tile. If you aren’t sure, hire a licensed plumber, since water damage from a poorly installed pan can be costly.
How to Choose a Shower Pan
Check your plumbing. Where is the drain, and can it move? Measure the space. Width, depth and any alcove limits. Choose the material. Acrylic for a budget, cast iron for durability, tile-ready for a custom look. Pick the drain position. Center, offset or linear. Choose the shape. Rectangle, square or corner. Think about entry. A low threshold is easier to step over. Check slip resistance. Look for a textured surface. Check the weight. Cast iron needs a strong floor. Consider cleaning. Smooth, non-porous surfaces clean more easily. Set a budget. Include installation and the surround. Check the warranty.
Care and Cleaning
Clean acrylic and fiberglass with a mild, non-abrasive cleaner. Harsh scrubbers can scratch the surface. Rinse after cleaning. Dry the pan with a squeegee if you can. Check the caulk and grout around the pan each year, and replace them if they crack. Never ignore soft spots or flexing in the pan, which can signal an unsupported area.
What mistakes should you avoid?
A few common mistakes are worth avoiding: ignoring the drain location (moving a drain costs money); choosing a pan that doesn’t fit the walls (measure carefully); skipping the subfloor check (an uneven floor can crack the pan); using abrasive cleaners (they scratch acrylic and fiberglass); poor sealing (leaks start at the edges); choosing the wrong slope (water must drain, not pool).
Further reading: EPA guidance on mold and moisture in the home.
Frequently Asked Questions
What is a shower pan?
The floor of the shower. It slopes to a drain and catches water.
What is the best material for a shower pan?
Acrylic is the usual budget pick. Cast iron is the most durable. Tile-ready bases offer the most design freedom.
What size shower pan do I need?
It depends on your space and local code. Common widths run from about 30 to 60 inches. Measure your alcove and check the plumbing.
Should I choose a center drain or an offset drain?
Center drains are common and versatile. Offset drains help when existing plumbing can’t move.
Can I install a shower pan myself?
Drop-in pans are doable for confident DIYers. Poor installation can cause leaks, so hire a pro if you’re unsure.
How long does a shower pan last?
It depends on the material and care. Well-installed pans can last many years.
Conclusion
A shower pan keeps water where it belongs. Choose a material that suits your budget and needs, a size that fits your space and a drain position that works with your plumbing.
Check the subfloor, seal the edges well and follow the maker’s guide. With careful planning, your shower pan can stay leak-free and look good for years.
Related guides
 Shower Pan Sizes: 32×32, 36×36, 60×32, 60×36 Standard Dimensions, Drain Position and ADA NotesQuick answer: common shower pan sizes are 32 by 32 inches (small or corner showers), 36 by 36 inches (the…Read more →
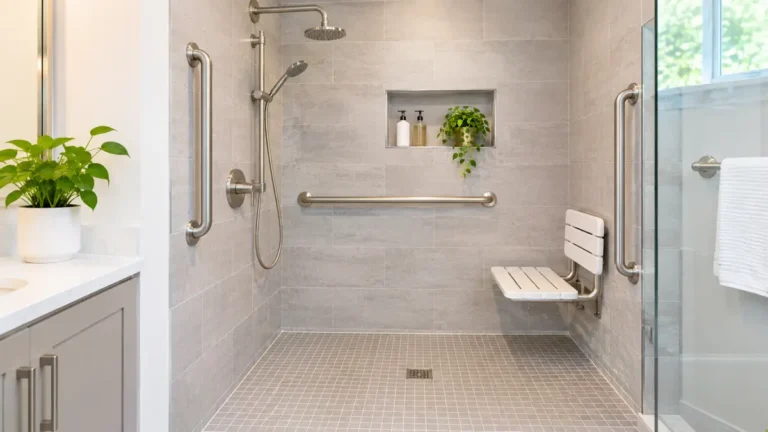 Roll-In Shower: Size, Threshold, Slope and What Accessibility Rules Usually RequireA roll-in shower is a shower with no curb, so a person using a wheelchair can roll straight in. Vendors…Read more →
 Shower Shelf: Tension Pole, Adhesive and Built-In Types, Weight and RustThere are three main types of shower shelf: tension-pole caddies, adhesive-mounted shelves and glued-in or…Read more →
 Shower Squeegee Guide: How to Use It Daily, Prevent Mold and Hard Water Spots, Blade and Handle TipsQuick answer: a shower squeegee removes water from glass, tile and fixtures right after you shower, before it…Read more →